
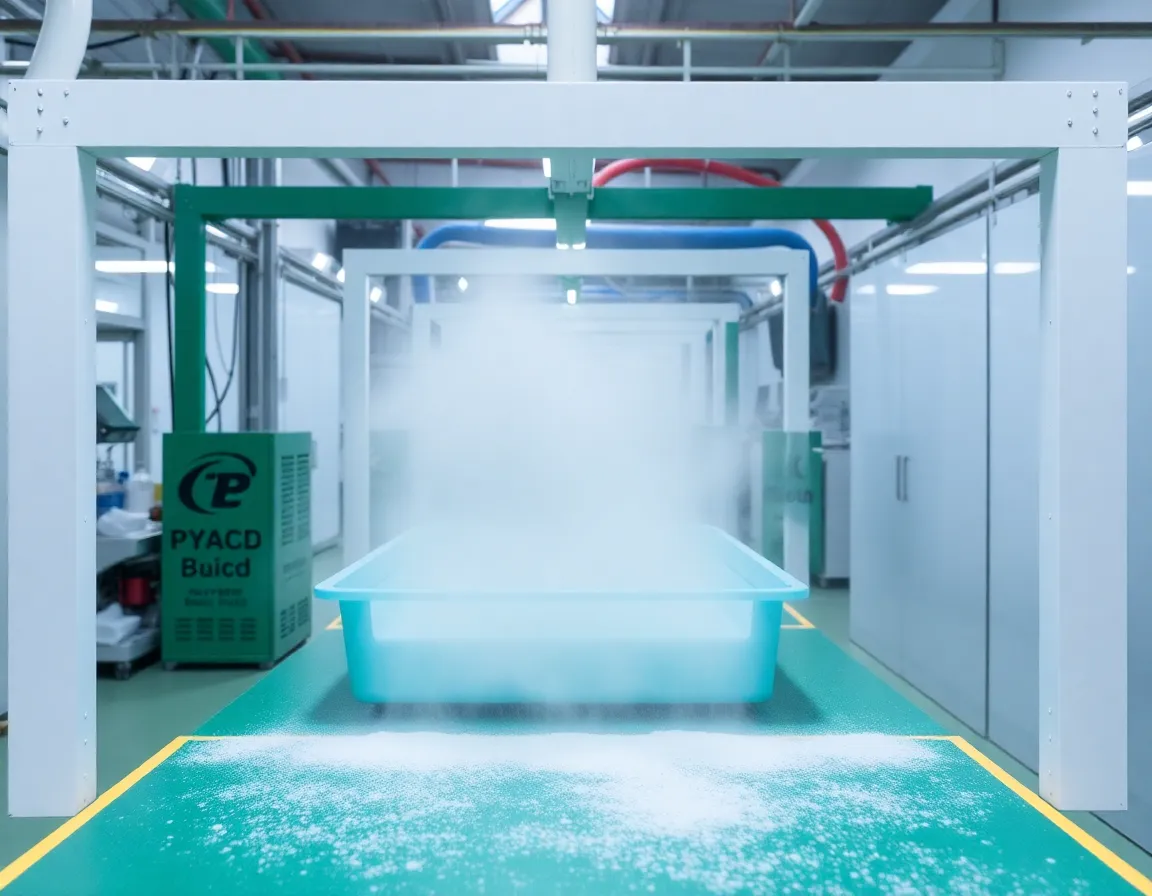
مقدمة: عالم تجميع البلاستيك في غرف الأبحاث النظيفة عالي المخاطر
في الصناعات التي تتراوح من تصنيع أشباه الموصلات إلى تغليف الأدوية، فإن تجميع المكونات البلاستيكية داخل بيئة خاضعة للرقابة ليس مجرد خطوة إجرائية - بل هو محدد حاسم لإنتاجية المنتج وسلامته وامتثاله التنظيمي. يشير تجميع البلاستيك في غرف الأبحاث النظيفة إلى ربط أو تثبيت أو لحام أو لصق أجزاء البوليمر في منشأة يتم فيها تنظيم تركيز الجسيمات المحمولة في الهواء ودرجة الحرارة والرطوبة والضغط بدقة. على عكس التصنيع القياسي، تتطلب هذه العملية مزيجًا فريدًا من علوم المواد والتحكم في التلوث والهندسة الدقيقة. يمكن لجسيم مجهري واحد أو تفريغ كهروستاتيكي أو تقنية معالجة غير صحيحة أن تجعل دفعة كاملة من الأجهزة الطبية أو الإلكترونيات الدقيقة عديمة الفائدة.
على الرغم من أهميتها، فإن العديد من المهندسين ومديري الإنتاج يقللون من شأن التعقيد الذي تنطوي عليه. يفترضون أن بدلة غرفة الأبحاث النظيفة ومرشح HEPA كافيان. الواقع أكثر دقة بكثير. بصفته كاتب محتوى محترفًا يتمتع برؤية صناعية عميقة، لاحظت أن معظم حالات فشل التجميع لا ترجع إلى البلاستيك نفسه، بل إلى إغفالات إجرائية وبيئية يمكن تجنبها. تحلل هذه المقالة الأخطاء السبعة الأكثر خطورة التي ترتكب أثناء تجميع البلاستيك في غرف الأبحاث النظيفة، وتوفر استراتيجيات قابلة للتنفيذ للتخفيف من المخاطر وتقليل النفايات وضمان الامتثال للمعايير الصارمة مثل ISO 14644 وإرشادات GMP. سواء كنت تقوم بتجميع موصلات Luer للمحاقن أو الهياكل الداخلية لإلكترونيات الطيران الفضائية، فإن تجنب هذه المزالق سيحمي سمعتك وأرباحك.
الخطأ #1: تجاهل انبعاث الغازات الخاص بالمواد والمركبات العضوية المتطايرة (VOCs)
الخطأ الأول وربما الأكثر خبثًا هو معاملة جميع المواد البلاستيكية على أنها خاملة. في غرفة الأبحاث النظيفة، لا تُعرَّف جودة الهواء بالجسيمات فحسب، بل أيضًا بالتلوث الكيميائي. تطلق العديد من اللدائن الهندسية - مثل البولي كربونات وABS وبعض البولي أميدات - مركبات عضوية متطايرة (VOCs) وتخضع لانبعاث الغازات، خاصة عند تعرضها للحرارة أثناء اللحام بالموجات فوق الصوتية أو الربط بالمذيبات. يمكن أن تتكثف هذه الانبعاثات الكيميائية على الأسطح البصرية الحساسة، أو تتآكل الدوائر الدقيقة، أو تلوث قوارير الأدوية المعقمة.
الخطر الخفي للمواد المضافة
غالبًا ما تتضمن تركيبات البلاستيك مواد ملدنة، ومثبطات اللهب، وعوامل تحرير القوالب. أثناء التجميع، يمكن أن يؤدي الاحتكاك أو درجات الحرارة المرتفعة إلى هجرة هذه المواد المضافة إلى السطح. إذا كانت عملية الغرفة النظيفة لديك لا تأخذ ذلك في الاعتبار، فأنت تخاطر بالتلوث المتبادل للمكونات المجاورة. الخطأ الحرج هو الفشل في إجراء اختبار تأهيل المواد في ظل ظروف التجميع المحاكاة. يجب عليك قياس إجمالي فقدان الكتلة (TML) والمواد المكثفة المتطايرة المجمعة (CVCM) وفقًا لمعايير ASTM E595. بالنسبة للتطبيقات عالية الموثوقية، حدد درجات منخفضة الانبعاثات مثل PEEK أو PTFE، وتأكد من أن بيئة التجميع لديك تحتوي على ترشيح كيميائي (كربون منشط) بالإضافة إلى مرشحات الجسيمات.
علاوة على ذلك، لا تفترض أن حبيبات البلاستيك "النظيفة" تظل نظيفة بعد البثق. عملية التجميع نفسها - خاصة وضع العلامات بالليزر أو اللحام باللوحة الساخنة - يمكن أن تولد منتجات ثانوية للتحلل. أفضل ممارسة هي تنفيذ دورة تفريغ الغاز أو الخبز قبل التجميع للمكونات التي سيتم لحامها أو ربطها، لإزالة الرطوبة المرتبطة بالسطح والمونومرات غير المتفاعلة قبل دخولها إلى منطقة التجميع الحرجة.
الخطأ #2: إهمال التحكم في التفريغ الكهروستاتيكي (ESD) للبوليمرات غير الموصلة
البلاستيك عازل طبيعي. عندما يحتك سطحان من البوليمر ببعضهما أثناء التجميع - على سبيل المثال، أثناء إدخال التثبيت المفاجئ أو التغذية بوعاء اهتزازي - يولدان شحنات ساكنة كبيرة، غالبًا ما تتجاوز 10000 فولت. هذا إغفال كارثي في الغرف النظيفة حيث توجد مكونات إلكترونية. الخطأ مزدوج: افتراض أن المؤين اختياري، واستخدام أدوات بلاستيكية قياسية ليست موصلة للكهرباء الساكنة.
لماذا تعتبر الكهرباء الساكنة قاتلًا صامتًا
لا يؤدي التفريغ الساكن إلى تدمير رقائق أشباه الموصلات الهشة فحسب، بل يجذب أيضًا الجسيمات المحمولة في الهواء مثل المغناطيس. سوف تسحب قطعة البلاستيك المشحونة جسيمات دون ميكرونية من الهواء، مما يبطل الغرض من الغرفة النظيفة. يعتقد العديد من المشغلين أنه نظرًا لأنهم يرتدون أحزمة معصم آمنة من ESD، فإن البلاستيك مؤرض. هذا غير صحيح. لا يمكن تأريض البلاستيك غير الموصل; ؛ فهي تتطلب معادلة نشطة. الخطأ الحرج هو الفشل في استخدام منفاخات التأين وشرائط مضادة للكهرباء الساكنة في كل محطة تجميع حيث يتم التعامل مع الأجزاء البلاستيكية أو نقلها أو تكديسها.
علاوة على ذلك، فإن اختيار تركيبات التجميع مهم. تعتبر الرقصات المصنوعة من الألومنيوم موصلات ممتازة ولكنها يمكن أن تلحق الضرر بالأجزاء؛ تولد تركيبات النايلون أو الأسيتال القياسية شحنة. بدلاً من ذلك، استخدم تركيبات مصنعة من أسيتال موصل للكهرباء الساكنة (ESD-acetal) أو مطلية بـ PTFE موصل. راقب أيضًا الرطوبة - إذا كانت غرفتك النظيفة جافة جدًا (أقل من 40٪ رطوبة نسبية)، يزداد توليد الكهرباء الساكنة بشكل كبير. حافظ على نطاق رطوبة نسبية صارم يتراوح بين 45-55٪ لتبديد الشحنات بشكل طبيعي. يؤدي تنفيذ هذه الضوابط إلى تقليل جذب الجسيمات ومنع الأعطال الكامنة في التجميعات الإلكترونية.
الخطأ رقم 3: التحكم غير الكافي في الاحتكاك وتوليد الجسيمات أثناء عمليات الضغط والتثبيت المفاجئ
التجميع الميكانيكي للبلاستيك، مثل ضغط محور على عمود أو تثبيت غطاء على هيكل، يولد حطامًا ناتجًا عن التآكل بطبيعته. هذه مشكلة فيزيائية أساسية: عندما ينزلق سطحان ضد بعضهما البعض تحت الضغط، تنفصل النتوءات المجهرية، مما يخلق جسيمات. في غرفة نظيفة، هذه الجسيمات هي العدو. الخطأ الحرج هو تصميم أو اختيار عمليات التجميع التي تعتمد على تداخل عالي الاحتكاك دون النظر في ميزانية الجسيمات.
هندسة الاحتكاك بعيدًا
لتجنب ذلك، يجب إعادة التفكير في تصميم المفصل. بدلاً من الملاءمة الضيقة للتداخل بين المعدن والبلاستيك، استخدم مدخلًا مستدقًا مع طلاء مزلق (على سبيل المثال، طبقة رقيقة من مادة التشحيم الجافة الخالية من السيليكون مثل ثاني كبريتيد الموليبدينوم أو PFPE الطبية). بدلاً من ذلك، تحول إلى اللحام بالليزر أو التثبيت المداري حيث يتم تسخين المادة محليًا وتشكيلها دون تلامس انزلاقي. إذا كانت أدوات التثبيت المفاجئة حتمية، فتأكد من تصميم شعاع التثبيت بزاوية انحراف محكومة (أقل من 30 درجة) لتقليل الاحتكاك.
جانب آخر يتم تجاهله هو مادة الأدوات. Hardened steel punches can micro-machine the plastic surface, creating flakes. Use tools with a mirror-polished finish or, better yet, use urethane or rubber-coated anvils that conform to the part without cutting. Furthermore, implement a vibration analysis on your automated assembly press; excessive vibration causes chatter, which dramatically increases wear. Finally, after any mechanical joining step, include an air knife or vacuum extraction point immediately downstream to capture debris before it migrates. Do not rely on the final wash to remove particles—by then, they have already embedded into other surfaces.
Mistake #4: Using the Wrong Cleaning Agents and Solvents for Post-Assembly Degreasing
After plastic assembly, parts often require cleaning to remove fingerprints, mold release, or machining oils. However, the choice of cleaning solvent is a minefield. Many standard solvents—acetone, isopropyl alcohol (IPA), or chlorinated hydrocarbons—can cause environmental stress cracking (ESC) in amorphous plastics like polycarbonate or polysulfone. The mistake is using a "universal" cleaning process without verifying chemical compatibility with the specific polymer blend and its additives.
The ESC Trap and Residue Issues
Even a brief wipe with IPA can initiate microscopic cracks that propagate under load, leading to premature failure in the field. Instead, use aliphatic hydrocarbon solvents (e.g., heptane) or specialized non-ionic aqueous cleaners with a neutral pH. For critical medical devices, consider CO₂ snow cleaning أو plasma cleaning—these are dry processes that leave zero residue and do not attack the polymer matrix.
Furthermore, the cleaning process itself must be validated. If you use ultrasonic cleaning, the cavitation energy can erode soft plastics like polyethylene. If you use manual wiping, ensure the wipes are low-linting cleanroom wipes (e.g., knitted polyester) and are saturated with the solvent—a dry wipe creates friction and re-deposits oils. Always perform a final rinse with ultra-pure water (18 MΩ-cm) followed by a forced HEPA-filtered air dry. Document the cleaning parameters and perform periodic residue testing via FTIR or ion chromatography to ensure your process remains in control.
Mistake #5: Neglecting Thermal Expansion Mismatch in Welded or Bonded Assemblies
Cleanroom plastic assembly often involves joining dissimilar materials—for example, bonding a polypropylene filter housing to a stainless steel port, or welding a PETG window into an ABS frame. The critical mistake is ignoring the coefficient of thermal expansion (CTE) differences. When the assembly experiences temperature fluctuations during autoclaving, curing, or even normal operation, the differential expansion creates internal stress that can cause bond-line failure, warpage, or micro-cracking.
Designing for Thermal Reality
To mitigate this, you must design the joint to accommodate movement. For adhesive bonding, use a flexible, high-elongation adhesive (e.g., a silicone-based adhesive or a polyurethane with 200% elongation) rather than a rigid cyanoacrylate. For ultrasonic welding, ensure the weld joint is designed as a shear joint rather than a butt joint, allowing slight relative movement without breaking the molecular bond.
Additionally, during the assembly process, control the ambient temperature strictly. If you are welding a part at 22°C but the part was stored at 30°C in a warehouse, the thermal gradient will cause uneven shrinkage. Implement a soak-out period—store all components and fixtures in the cleanroom for at least 24 hours before assembly to equilibrate. For high-precision assemblies, use a climate-controlled assembly chamber with ±0.5°C stability. Finally, perform a thermal cycle test (e.g., -40°C to +85°C for 100 cycles) on your first articles to validate that your joint design and material selection can survive real-world conditions. Skipping this validation is a recipe for field failures.
Mistake #6: Inconsistent Torque and Fastening Protocols for Threaded Plastic Components
Many cleanroom assemblies use threaded fasteners—either self-tapping screws into plastic bosses or threaded inserts. The critical mistake is using the same torque settings as for metal assemblies. Plastics are viscoelastic; they relax under constant load. A screw that is torqued to 10 in-lbs today may lose 30% of its clamping force within 24 hours due to creep and stress relaxation. This leads to loose joints, leaks, and particulate generation from fretting.
The Correct Fastening Strategy
First, never use standard sharp-thread screws. Use screws specifically designed for plastics, such as PT® (Plastic Thread) screws with a 30° thread angle and a blunt tip. These displace material rather than cut it, providing higher pull-out resistance and lower radial stress. Second, use a torque-controlled driver with a slow approach speed. High-speed driving creates heat, which melts the plastic boss and weakens the threads. Set the driver to a low RPM (under 300 RPM) and use a depth-stop or pressure-sensitive shut-off to prevent stripping.
Third, consider the use of metal threaded inserts (heat-staked or ultrasonic-inserted) instead of screws directly into plastic. This provides a robust, reusable thread and eliminates the risk of boss cracking. If you must use self-tapping screws, design the boss with an undersized pilot hole (typically 80-85% of the screw's minor diameter) and a stress-relief counterbore at the top. Finally, implement a torque audit protocol: every hour, assemble a test part and measure the prevailing torque and clamp load. Use a digital torque analyzer that records peak torque and angle. This data will reveal if your fasteners or plastic batches are drifting out of spec. Do not trust the "click" of a manual wrench.
Mistake #7: Failing to Validate the Cleaning and Packaging Interface
The final critical mistake occurs after the assembly is complete: the interface between the cleanroom assembly line and the packaging process. Many manufacturers spend millions on cleanroom assembly only to compromise the product with contaminated packaging materials or by breaking the cleanroom barrier during transfer. The mistake is treating packaging as a secondary concern rather than an integral part of the cleanroom protocol.
The Contamination Handoff
If your assembled plastic part is placed into a standard cardboard box or a non-cleanroom polyethylene bag, it will immediately attract fibers and particles. The packaging must be certified cleanroom-grade (e.g., Class 100/ISO 5 cleanroom bags) and must be compatible with the plastic (no plasticizers that can leach into your part). Furthermore, the transfer from the assembly cleanroom to the packaging cleanroom must be through a pass-through chamber with interlocked doors, not an open doorway. You must also validate the shelf life of the packaged assembly—some plastics continue to outgas and can fog the interior of a sealed pouch.
Additionally, do not overlook the labeling and adhesive used on the packaging. The adhesive on a label can outgas volatile silicones that contaminate the part. Use solvent-free, cleanroom-compatible labels. Finally, establish a particle count verification step just before sealing. Use a liquid particle counter (if the part is rinsed) or a surface particle counter (via swabbing) to ensure the final product meets the required cleanliness level (e.g., ISO 14644-9 for surface cleanliness). If the part fails, you must have a re-cleaning and re-validation loop. This final step is not just about quality—it is about regulatory compliance and patient safety in medical applications.
Conclusion: Building a Culture of Precision
Avoiding these seven critical mistakes in cleanroom plastic assembly is not a one-time checklist; it is a continuous engineering discipline. The common thread among all these failures is a lack of systematic validation—of materials, processes, environmental controls, and packaging. In the world of cleanroom manufacturing, "good enough" is rarely good enough. The cost of a single failed batch due to outgassing, ESD damage, or torque relaxation can exceed the savings of a thousand minor optimizations.
To truly excel, you must adopt a holistic contamination control strategy that integrates material selection, process design, tooling, environmental monitoring, and operator training. Your cleanroom operators must understand why they cannot use a standard rag, why they must slow down the screwdriver, and why the packaging bag is as important as the assembly cell. When you foster this level of awareness, you transform cleanroom assembly from a mere manufacturing step into a competitive advantage—delivering products that are reliable, compliant, and trusted by the most demanding customers in the world.
As you review your current cleanroom plastic assembly operations, ask yourself: Are we measuring outgassing? Are we neutralizing static? Are we validating thermal cycles? Are we auditing torque? If you answered "no" to any of these, you have identified your next improvement project. The path to zero defects is paved with meticulous attention to these seemingly small details. Do not let a microscopic particle or a creeping torque value be the reason your product fails in the field. Take action today.